Setting up your domain for SPF, DKIM & DMARC
Setting up your domain to comply with SPF, DKIM, and DMARC requirements that are being implemented by more and more email providers is easy with Keila!
This document only applies if you are using Keila Cloud.
If you are using a self-hosted instance, these instructions won’t work.
1. Create a Send with Keila Sender
If you don’t yet have one, create a Sender in your Keila project and select the Send with Keila option.
Make sure you can receive emails at the From address
(e.g., newsletter@example.com) so you can receive the confirmation email.
2. Update your DNS
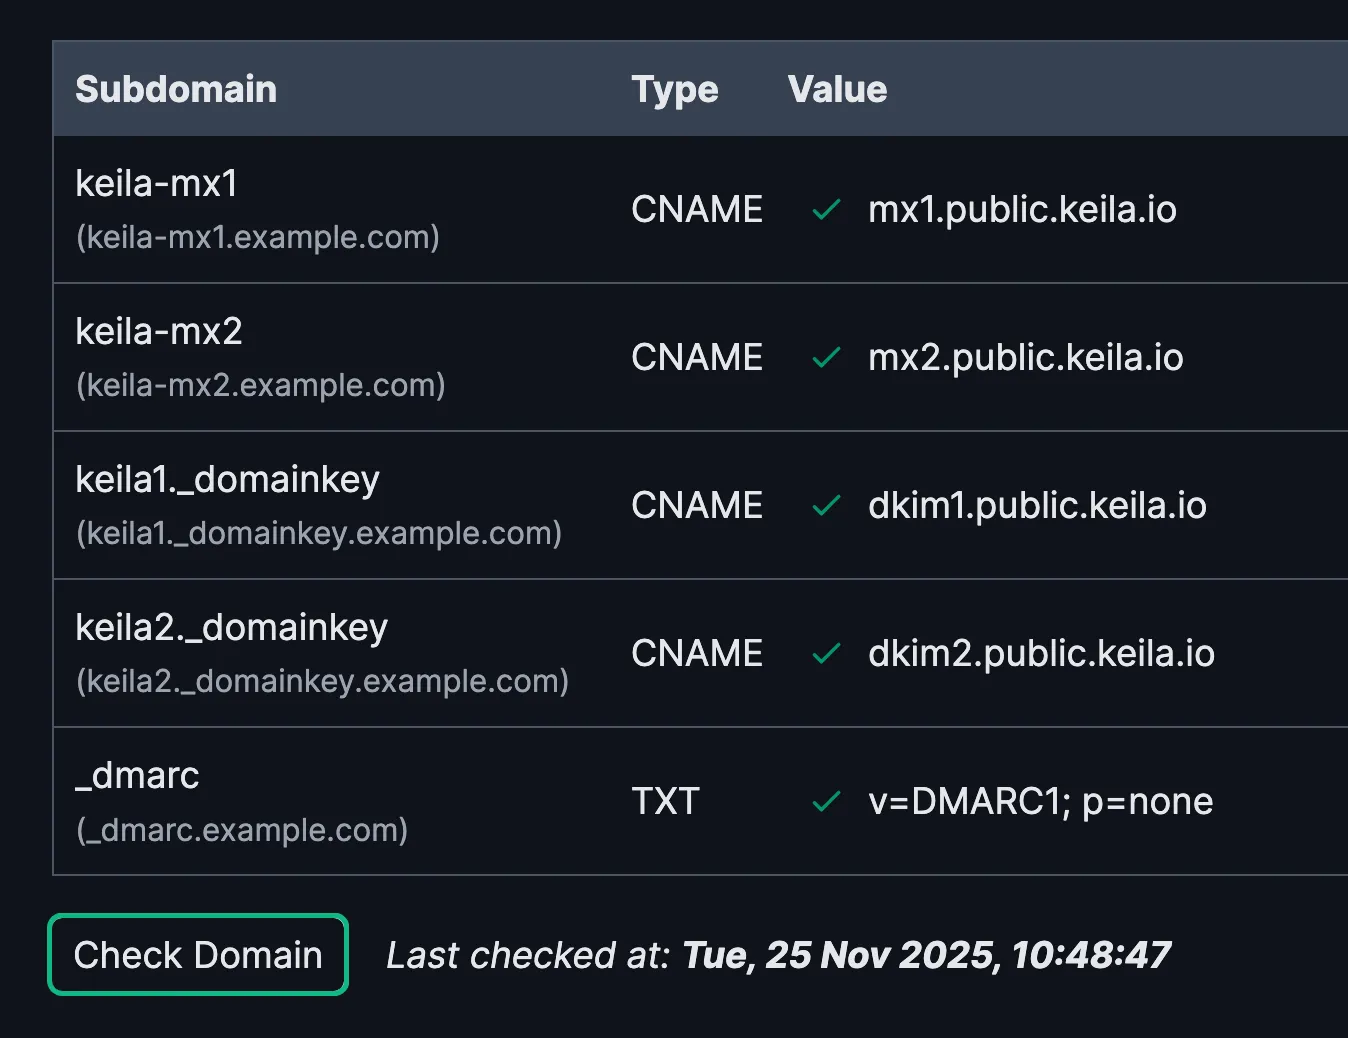
The sender page will now show you the DNS entries you need to add to your DNS settings.
Add them to your DNS settings:
| Subdomain | Type | Value |
|---|---|---|
| keila-mx1 | CNAME | mx1.public.keila.io |
| keila-mx2 | CNAME | mx2.public.keila.io |
| keila1._domainkey | CNAME | dkim1.public.keila.io |
| keila2._domainkey | CNAME | dkim2.public.keila.io |
You also need a valid DMARC entry. If you don’t have one yet, you can add a simple entry like this:
| Subdomain | Type | Value |
|---|---|---|
| _dmarc | TXT | v=DMARC1; p=none |
3. Wait for DNS propagation
It can take up to several hours for DNS changes to propagate to all email providers. Keila usually picks up your changes within a few minutes. You can manually check your settings by clicking the Check domain button.